- (731) 665-7488
- 14 Circle S Road, Rutherford, TN 38369
Modern planters often carry liquid fertilizer systems to deliver starter, in-furrow, or 2×2 nutrients right when seeds need them most. A properly set up system helps crops establish quickly, improves uniform emergence, and maximizes input efficiency.
But these systems also have multiple moving parts: pumps, manifolds, hoses, meters, check valves, and tips. A weak link in any part of the system can throw off rates or placement. That’s why a clear planter liquid setup checklist is so valuable before you hit the field.
Each type requires correct setup and calibration.
Before each planting day:
Accurate calibration ensures gallons per acre match your plan.
Example: 5 GPA (gallons per acre) in-furrow.
Run system with water, catch flow from one row for 1 minute.
Use this formula: GPA=5940×GPMSpeed (mph)×Row Spacing (in)\text{GPA} = \frac{5940 \times \text{GPM}}{\text{Speed (mph)} \times \text{Row Spacing (in)}}
Where:
Change pressure, speed, or orifice size until actual GPA = target GPA.
| Problem | Likely Cause | Solution |
|---|---|---|
| Uneven flow across rows | Plugged nozzle, bad check valve, kinked hose | Clean or replace nozzle, check hoses |
| Low overall pressure | Weak pump, clogged filter, air leak | Check pump, replace filter, tighten fittings |
| Over-application | Rate controller miscalibrated | Recalibrate using actual flow test |
| Under-application | Wrong orifice size, pump too small | Install larger orifice, upgrade pump |
| Leaks | Cracked hose, loose clamp, bad gasket | Replace hose, tighten or replace clamp |
Pre-Season:
Daily In-Season:
Q: How often should I replace nozzles?
A: Replace every 1–2 seasons or after 10% wear, whichever comes first.
Q: Can I run fertilizer and insecticide through the same system?
A: Possible, but clean thoroughly between products to avoid residue buildup.
Q: What’s the best pump type?
A: Hydraulic pumps offer steady flow for larger planters. Electric pumps work well on smaller planters or for in-furrow systems.
Q: What about starter fertilizer salt damage?
A: Stay within safe in-furrow rates. Consider using low-salt formulations or move to 2×2 placement for higher volumes.
Setting up your planter liquid system is more than filling a tank and turning on the pump. It’s a careful process of inspection, calibration, and daily checks.
A reliable planter liquid system means healthier seedlings, stronger stands, and less frustration at planting time.
How to properly ground your electric fence for safety, performance, and reliability
An electric fence is only as good as its grounding system. Farmers often focus on energizers, wires, and posts but forget that the fence circuit can’t work without a solid ground return. A poorly grounded fence won’t carry full voltage, won’t deter livestock, and can even damage your energizer.
This guide explains why grounding matters, what materials to use, and the exact steps to build, test, and maintain a reliable ground system.
If the soil is dry, frozen, sandy, or rocky, current doesn’t return well. That’s why grounding must be designed carefully.
| Problem | Likely Cause | Fix |
|---|---|---|
| Fence voltage low everywhere | Poor ground system, insufficient rods | Add rods, improve moisture |
| Voltage drops far from energizer | Broken wires, poor connections, poor grounding | Check splices, test ground |
| Livestock not respecting fence | Shock too weak due to grounding or vegetation | Improve ground, clear weeds |
| Energizer overheating | Ground fault, bad rod connections | Recheck clamps, rods |
Q: Can I use just one ground rod?
A: Not recommended. Even small energizers need at least 2–3 rods for reliable performance.
Q: How far should rods be from buildings?
A: At least 50 feet, to avoid stray voltage entering water systems, barns, or wiring.
Q: Do ground rods wear out?
A: Yes, corrosion reduces conductivity. Replace rods every 10–15 years or if testing shows poor performance.
Q: How often should I test?
A: At least once per season, and always after major drought or freeze.
Grounding is the most overlooked part of an electric fence. Done poorly, it weakens shock and wastes money. Done right, it makes your fence strong, safe, and long-lasting.
A strong ground means a strong fence.
How to clean your sprayer properly to protect crops, equipment, and yourself
Sprayer cleanout prevents residue carryover, crop damage, clogged parts, and equipment corrosion. Doing it right helps avoid costly errors. Always follow the label instructions of the chemicals you used—and the ones you’ll use next. Use this guide for standard cleanout steps, then adapt to your particular tank, sprayer model, hoses, booms, nozzles and chemicals.
Before starting cleanout:
Use these steps as a strong general guide. For certain herbicides or products, label instructions might require more or different actions.
| Step | Action |
|---|---|
| 1. Spray Out Residual Product | As soon as spraying is done, spray out whatever mix is left in the tank, hoses, and boom. Don’t let the spray mix sit. |
| 2. Rinse with Clean Water | Partially fill tank (e.g. ~10% of capacity or more per label) with clean water. Recirculate the water through the system: pump it, run it through booms, hoses, nozzles. Spray some of it out through the boom. |
| 3. Remove and Clean Screens, Strainers, Nozzles & Filters | Remove these components; soak/clean with water + mild detergent or specified cleaner. Inspect for damage. Clean or replace as needed. |
| 4. Add Cleaning Agent | Set up the tank with water plus a cleaning agent (commercial tank cleaner, ammonia solution, detergent etc.), according to product labels. Stronger agents may be needed for stubborn or oily/herbicide residues. |
| 5. Agitate and Recirculate | Run the sprayer’s agitation, operate pump, flow cleaning solution through hoses and booms for several minutes (often 5-15 minutes). Ensure all components are addressed. |
| 6. Soak / Let Stand | After agitation, allow the cleaning solution to sit inside tank/lines for some time (several hours or overnight if possible) so residues loosen. |
| 7. Spray Out / Flush Cleaner | Spray the cleaning agent solution through the boom and nozzles. Then drain. Flush with clean water to remove cleaning solution. Repeat rinse until water is clear with no visible residue. |
| 8. Final Rinsing | Multiple rinses are usually more effective than one big rinse. Run clean water through all lines, hoses, booms, filters, nozzles. Check that no residual cleaning agent remains. |
| 9. Clean Exterior | Wash outside surfaces: tank interior lid, tank walls, boom exterior, pump seals, valves. Residue or drift can stick outside too. |
| 10. Reassemble & Store Safely | Put screens, tips, nozzles back. Check all fittings. Store sprayer in appropriate place. Protect from freezing if relevant. |
| Agent | Pros / Uses | Warnings / Limitations |
|---|---|---|
| Commercial tank cleaners | Formulated for both water- and oil-soluble chemicals; good general performance. Performance often best for oily or stubborn residues. | Cost; need correct mixing ratio; some cleaners may be harsh to materials if left too long. |
| Household ammonia | Helps with boosting pH, dissolving some residues, especially certain herbicides. | Do not mix with bleach or materials containing ammonia + bleach. Ammonia alone does not deactivate all chemicals. Follow label. |
| Detergents / Soap | Removes oily emulsions, helps clean filters, nozzles; mild on materials. | May not be enough alone for tough residues; might leave foam; can interfere with some chemical residues if incorrectly used. |
| Bleach (sodium hypochlorite) | Can deactivate certain herbicides; useful for heavy contamination. | Strong; can damage some materials; reactive with ammonia; safety hazards; dispose carefully; follow label. |
| Alkaline or high-pH cleaners | Some formulations elevate pH significantly, improving solubility of some hard-to-clean residues. | Can corrode metals or degrade seals/gaskets over time; must be compatible with the equipment. |
Here’s a typical timeline for a cleanout when switching from herbicide A to chemical B or before spraying a sensitive crop:
Before spraying next crop, tick off:
Here are a few common situations and how cleanout should be handled in each:
| Scenario | Recommended Adjustments |
|---|---|
| After using a strong herbicide like dicamba / 2,4-D and then spraying sensitive broadleaf plants | Use the most aggressive clean-out path: strong tank cleaner + multiple rinses + overnight soak; clean every hose, tip, screen; test a small batch before full field. |
| Daily reuse of same product, same crop | Basic flush + rinse + filter check may suffice; still good to do a full clean periodically. |
| Spraying oily or emulsion-based formulations | Use detergent cleaners; ensure surfactants dissolved; rinse until no film remains; possibly use hot water if safe. |
| Equipment used infrequently, stored long time | Clean thoroughly before storage; dry if needed; check seals after storage; flush again before use after long rest. |
Q: How many rinses are enough?
A: At least two rinses with water + cleaning agent, then several rinses with clean water until all residue and cleaning agent are gone. Many guides recommend triple-rinse.
Q: Can I use just water if I sprayed a mild chemical?
A: Sometimes yes, especially for simple or low-risk products. But water alone often cannot remove residues that have adhered or dried. If you skip cleaner, risk of residue carryover increases. Always check label.
Q: Is soaking overnight really necessary?
A: For many products, yes. It allows residues to loosen. If time doesn’t allow, longer soak or more rigorous rinse may reduce risk.
Q: What about cleaning the exterior of the sprayer?
A: Don’t skip it. Residue outside tank/booms/pump can lead to contact exposure, drift, runoff. Clean tank lid, boom arms, fittings.
Proper sprayer cleanout:
Follow label instructions, use correct cleaning agents, be thorough on all parts of the system, dispose of rinse water properly. A little effort before spraying can prevent big problems and financial losses later.
First-generation farmers view their livestock like their pets. While that is charming, it causes some interesting questions when they visit Circle S. I’ve lost track of how many times, I’ve had a bright young person ask me why they can’t give their livestock pet food.
Your dog, cat, goldfish, hamster has different dietary needs than livestock. While you might see a horse grazing on grass, it doesn’t mean that Mister Ed is ready to mow your lawn. For that, you would need John Deere or an ornery goat.
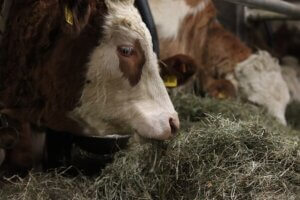
Even grass must be carefully prepared, processed into hay and then blended into a rotation to properly supplement a diet. All your cat needs for you to do is dish out the Whiskas and get out of its face.
The reason you don’t treat your livestock like your pets is that a horse the size of your Uber needs a little more consideration than your 10-pound Pomeranian. Forget all of the Science Diet and recommendations from your vet. The little guy you take for walks around the block doesn’t require the same daily movement just to eat. Don’t believe me?
When you go driving this week, look at the local farms. All of that space that isn’t used for direct farming isn’t for showing off.

The more industrious farmers can mill and mix their own livestock feed. However, it’s not recommended. Does that mean it is impossible? Of course not. What we’re saying is that most of the people asking about making their own livestock feed, don’t have the time or resources for the commitment. But, if you want to go down this path, here are some options available.
Free-range grasses work best for animals such as horses and cattle. That means you will need to be able to rotate pastures. If you can’t rotate pastures to produce enough feed, then you must buy hay. That can get expensive and you might not always be sure what kind of hay you’re buying.
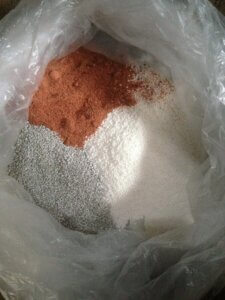
Pigs are the easiest for producing your own livestock feed. Like most of the smaller livestock options, you don’t have to worry about space. Feeding pigs usually requires making use of the scraps and related tidbits you already have on your farm. Barley, wheat and soybean remnants can be scrapped together and broken down into a baseline feed. The catch is knowing how much each size of pigs needs to chow down.
Chickens need a very fine grain. After all, our little feathered friends don’t have teeth. Still, these little guys will graze on a wide variety of grain. Even with that, your chickens should still be supplemented with a good mix of grains for a balanced diet.
But, what do you do if you’re out of farm space to make your own feed? As mentioned before, you can start getting into the pricey hay buying race. Yet, what happens if Farmer Brown treats his hay with chemicals? What happens if you buy a bad batch of hay?
Then, the effort to mill and mix your own livestock feed would be for not. You could still make your own if you have the space and time but take it from your livestock management friends. Stick to a known supplier that can keep your livestock well-fed and happy.
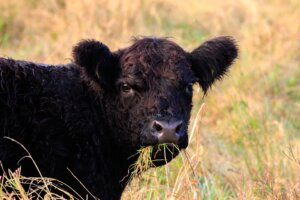
It’s every farmer’s dreams to have a large herd of livestock. Images of cowboys moving large amounts of cattle fill the heads of those toiling to make sure that this year’s newest critters get fed. Yet, all those dreams take a great deal of space to keep large herds happy and grazing. That’s right, fellow farmers. It’s going take wide open spaces for your livestock to feed.
Circle S Farm Supply realizes that not every farmer is working with a large swath of land. However, large herds of livestock need to roam, graze and possibly have rotated feeds. Even if you don’t make your own feed, you still must find a dedicated supplier to keep your livestock well-fed.

Even when you check off all those boxes, there still must be a set schedule to keep the livestock fed. That’s why we recommend hay rings and hay savers. Not every farmer can be out in the pasture making sure every herd eats right.
But, what you can do is buy one of our Bextra hay savers and make sure that the amount of feed is properly regulated. That’s right, farmers. Much like your stubborn house cat or littlest grand kid, you’ve got to keep an eye on how much your livestock eats.
Livestock management requires a few basics when it comes to feed. Yet, there always seems to be issues with feeding them. Most farmers write this off, as part of their daily workload. However, Circle S wonders if there is an easier way of handling this sort of thing.
Hay Rings are easy to construct and fantastic time savers. Just two pieces being snapped together will give you the means to feed your livestock. They’re portable and easy to construct. If that wasn’t enough, you also have the Bextra Heavy Duty Hay Savers. These metal creations will keep livestock from tearing apart your food dispensers.
Still, Circle S Farm Supply wonders if you’re forgetting to feed your crops. It goes beyond just watering and throwing fertilizer on them. How are you treating your soil? Have you thought about it?
Circle S Farm Supply is well known for its liquid plant food. That’s a supplement designed to better support your plants in the hot sun. However, our liquid fertilizer is designed to prime the dirt to help retain nutrients. The two factors working together will create a circle of trust that will keep your crop from withering and dying on those 100-degree days.
To the average farmer, most of this might sound silly. You know that you need to protect livestock feed. Also, you’re aware that you must treat plant food and fertilizer as two separate things. If there’s a lesson to be taken away from today’s post, it’s that you need to stay aware.
Staying aware of your ideal surroundings is essential to the successful farmer. It’s one thing to know that you’re hungry, but how will you meet the feed needs of the farming components? The balancing act is pretty intense, but one well worth engaging in for greater success.
Plant Food remains the greatest tool for prolonging your farm’s life.
While that might be a bold statement, hear me out. Fertilizer primes the soil and is ubiquitous. Every farmer worth their name knows what level of NPK they need to bring their crops to fruition. But, what about the plant food portion? You do use plant food, right?
Plant Food is that layer of defense between your prime crops and the elements. While the spring makes for a fun and fanciful planting season, you never know what the summer brings. The possible heat will dry up the water/nutrients in most crops. But, what about excessive rain and flooding?
Your water table can handle a degree of water. But, too much will eventually wash away the nutrients that your crops need to survive. What are you to do to ensure the survival of your crops?
At Circle S Farm Supply, we serve up some of the best liquid plant food in America. Those little droplets of crop goodness are delivered to you by the expert hands at Circle S. What this liquid gold does is seep into your targeted crop areas to feed and shield your plants from the unpredictable troubles of the outside world.
Plants left untreated by Circle S Farm Supply’s liquid plant food will face extreme distress. An untreated plant can exist for 10-14 days outdoors without needing plant treatment. Yet, you don’t always have the time as a farmer to pay attention to sub-sections of plants while ignoring the overall farm production. You’re not a florist.
Liquid plant food buys you that extra time to save crops and manage the continued life of your plants. On paper, that might not sound that beneficial. However, hard working farmers will understand the difference that a little extra time makes after riding a combine through 100-degree days and no air conditioning. Contact us anytime! Circle S is here to help.
All plants need Nitrogen, Phosphorus and Potassium to grow. Most farmers can take soil reads and get a sense of what they’re missing. But, what goes beyond NPK? Are you offering the right fertilizer to your soil?
But, do you know the other organic elements included in your liquid fertilizer? Now, it’s time to examine what makes the treatment so special for your crops. After all, if most NPK fertilizers just handle the big three, what is to be gained by adding the others?
Some of the additional elements included in plant growth are:
Magnesium – part of all chlorophyll, essential for photosynthesis.
Calcium – general plant vigor and growth.
Sulfur – promotes protein
Iron – helps form chlorophyll
Boron – aids in production of seed and fruit development
Zinc – transforms carbs, regulates sugars
Copper – reproductive growth
Manganese – helps with enzymes, breaks down carbs
Molybdenum – helps with nitrogen
Chlorine – aids metabolism, essential for photosynthesis.
Cobalt – essential for nitrogen fixation in young plants.
Every farmer wants to have a bountiful harvest. As a result, you do everything in your power to create the best environment for your crops to succeed. If you have any questions, reach out to Circle S Farm Supply.
Livestock Management is the farm tested art of keeping your animals happy. It’s also the practice of keeping your farm animals from busting out and tearing up your property. Everyone that works in Ag has had to track down a horse, cow or even a goat that busted out of their pen. Wouldn’t it be easier to have modern options to keep those critters locked down?
Look no further than your friends at Circle S Farm Supply. Circle S features the latest and greatest from Stay-Tuff and Gallagher. Have you seen the new Gallagher Power Fence products? How about those Galvanized Corral Panels and Grates?
It’s ok, pal. You’re among friends that love talking livestock. We are part of a field that gets to work with our hands, nurture a bounty of farm animals and produce the best crops that the Good Earth has to offer. It’s only natural to be excited about the tools that we get to use.
The aspect of livestock management that so many forget is Livestock feeding. After all, if you’re going to manage living creatures, you’ve got to keep their stomachs full. Heavy Duty Hay Rings are in-stock at Circle S Farm Supply. These hay rings allow busy farmers to feed large amounts of hay to their cattle without having to constantly be in the middle of the feeding.
If you want something a little heavier duty, Circle S also sells the Bextra Heavy Duty Hay Savers. The purpose is the same, as these hay feeders exist to keep cows and farmers happy. Circle S Farm Supply is ready to help you upgrade your livestock management. Contact us to learn about all the wonderful things you can do for your livestock.